When your TEDS wallet runs low — or before it does — top up via the Purchase TEDS page.
Where to top up
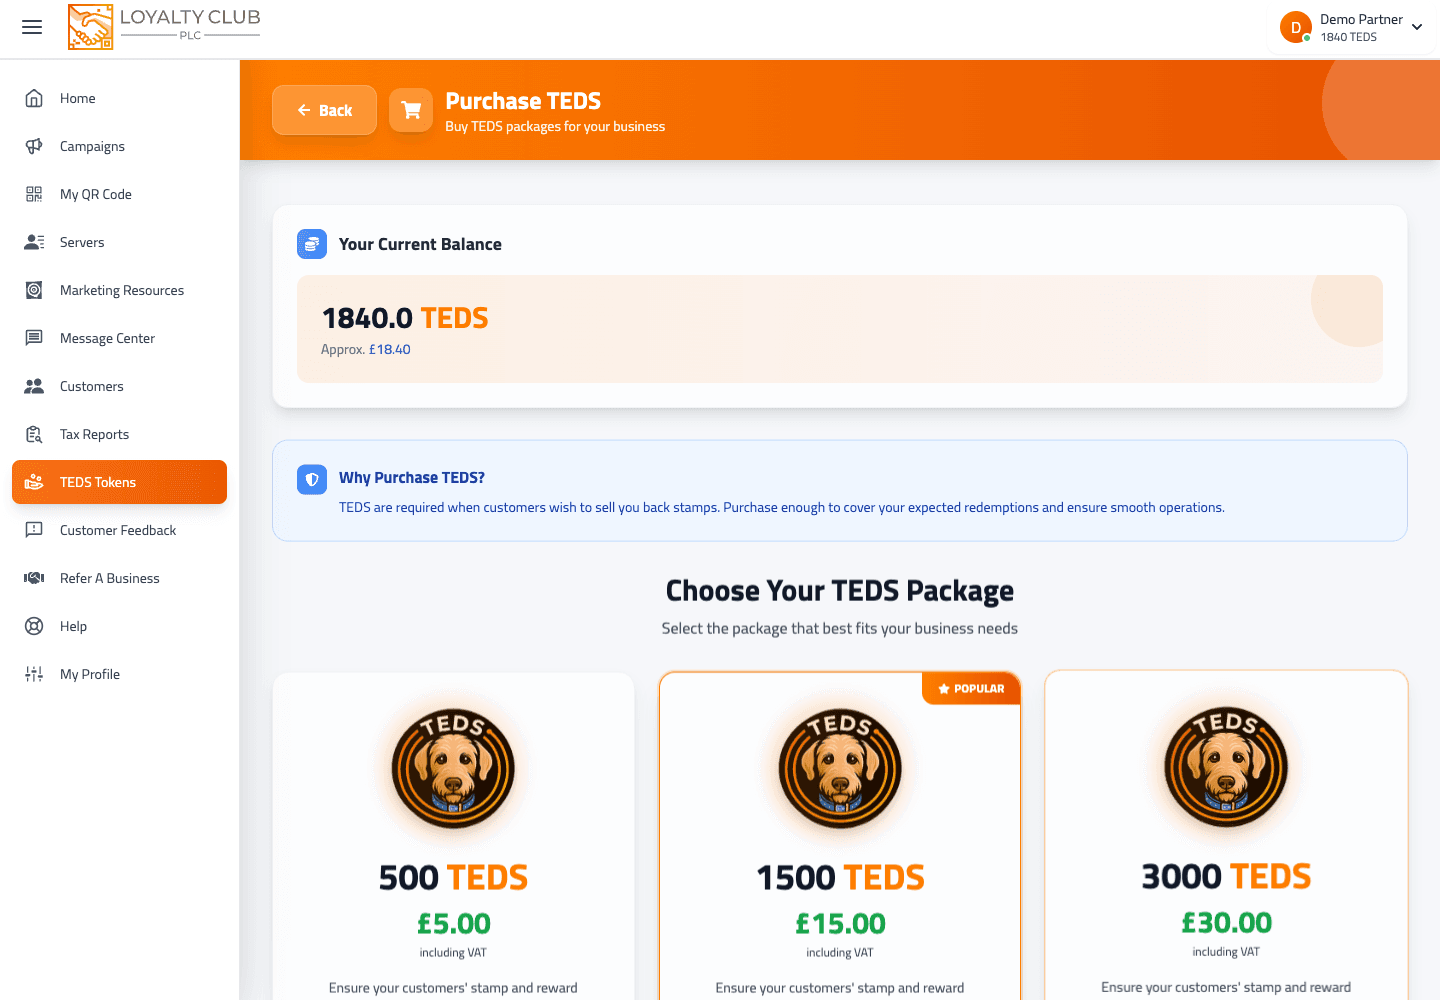
From the portal sidebar: TEDS → Purchase TEDS, or directly at /teds/purchase.
The page is the central place for buying TEDS for your wallet.
Picking a package
The packages available aren’t hardcoded — they’re fetched from the backend dynamically each time you load the page. So the exact amounts and prices you see depend on what’s currently offered.
The page highlights one package as "most popular" (currently the middle option of three, by default) but you can pick any.
Buying
- 01Select a package
Tap a package card. It becomes selected.
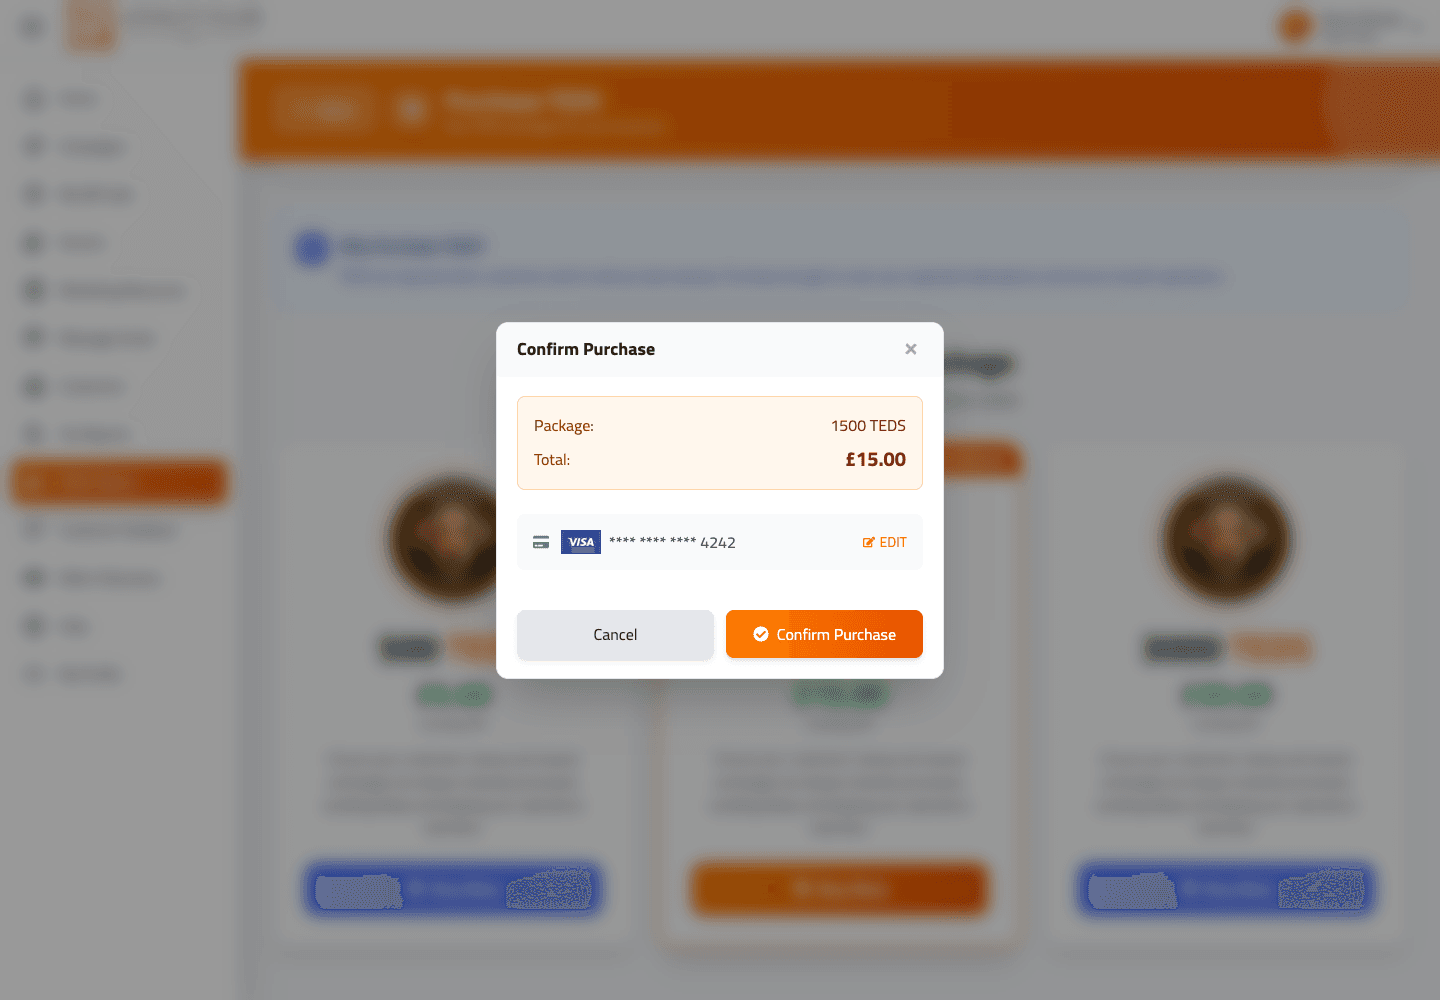
- 02Confirm
The Confirm Purchase action opens.
- 03Pay
Follow the secure payment step shown in the portal.
- 04Done
The new TEDS appear in your wallet on successful payment.
Why top up at all
Customers can convert stamps or completed rewards into TEDS, paid out from your wallet. If the wallet is too low to cover an exchange, the transaction enters a pending state. Topping up clears those pending exchanges.
For the longer explanation see Understanding TEDS as a partner.
How much to top up
A useful working rule: keep enough TEDS in your wallet to cover the value of any rewards your customers might exchange in the next couple of weeks. There’s no automated minimum balance enforced; the wallet just enters the pending state if it dips too low.
What to know
- Exact package prices and TEDS amounts — dynamic per backend.
- Payment provider for TEDS purchase — follow the checkout page you see when you pay; it will show the live provider and confirmation flow.
In one sentence
/teds/purchase → pick a package (dynamically fetched) → confirm → pay → TEDS land in your wallet.