

Add a team member ("Server") via the Add Server form. They get a separate ServerUser account that can scan member QRs and apply stamps but can’t manage your business — staff can’t open the Message Centre, so message campaigns and your club emails stay with you. See Staff permissions explained.
Adding
- 01Open Servers
From the portal sidebar.
- 02Click Add Server
Opens the Add Server form.
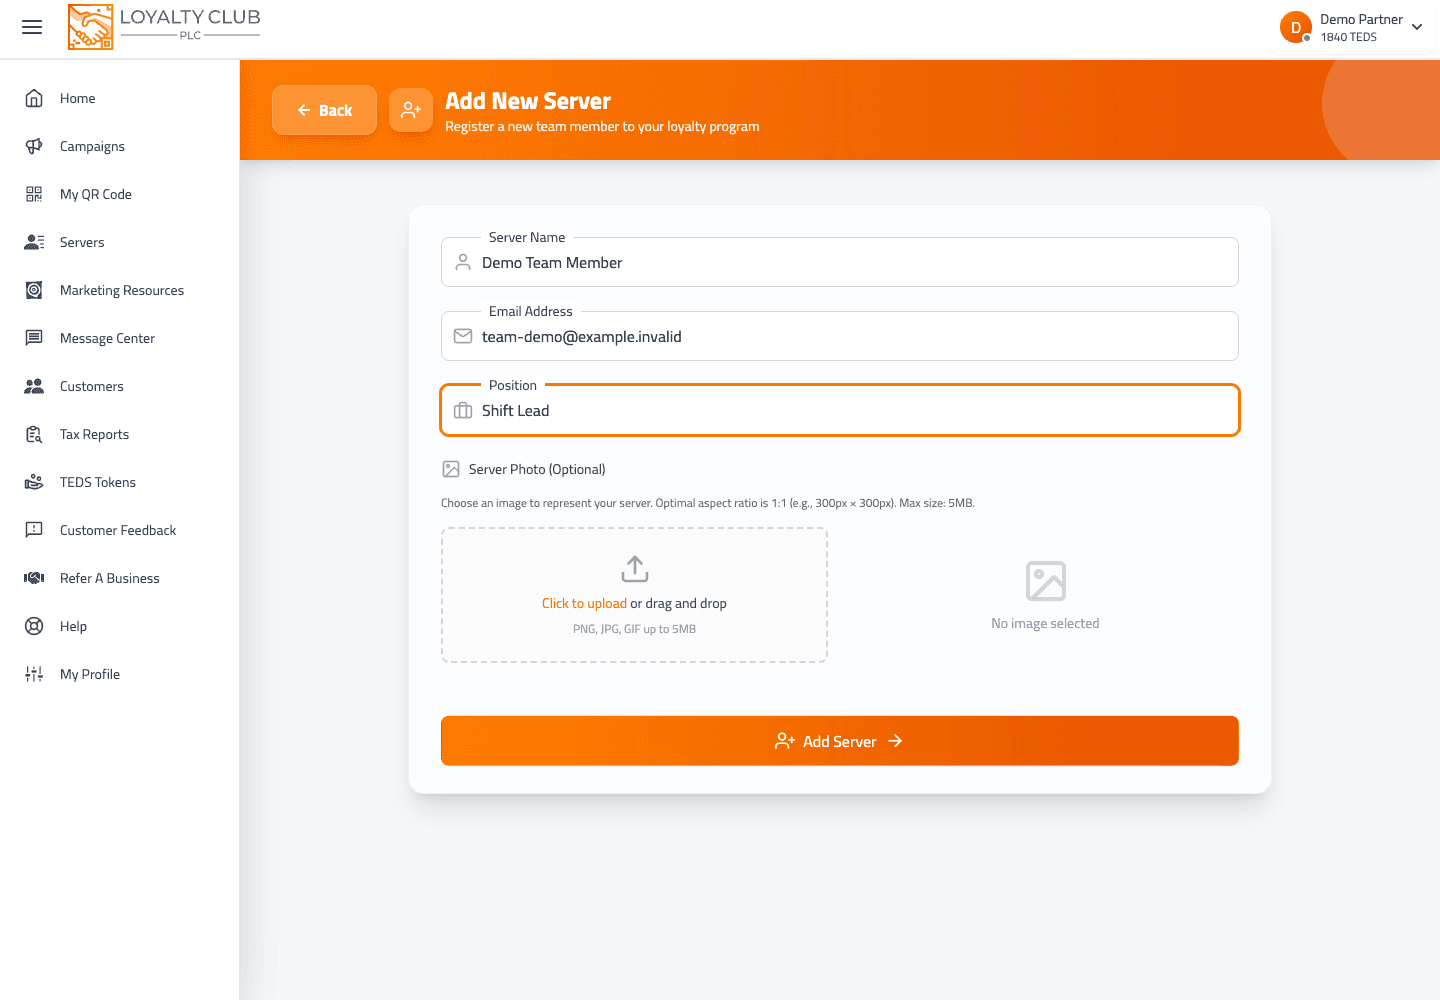
- 03Fill the fields
Name, email, position. Optionally upload a profile image (5MB limit).
- 04Submit
The staff member is registered. The form doesn’t collect a password — the staff member receives the onboarding flow via the email you provided.
Managing existing staff
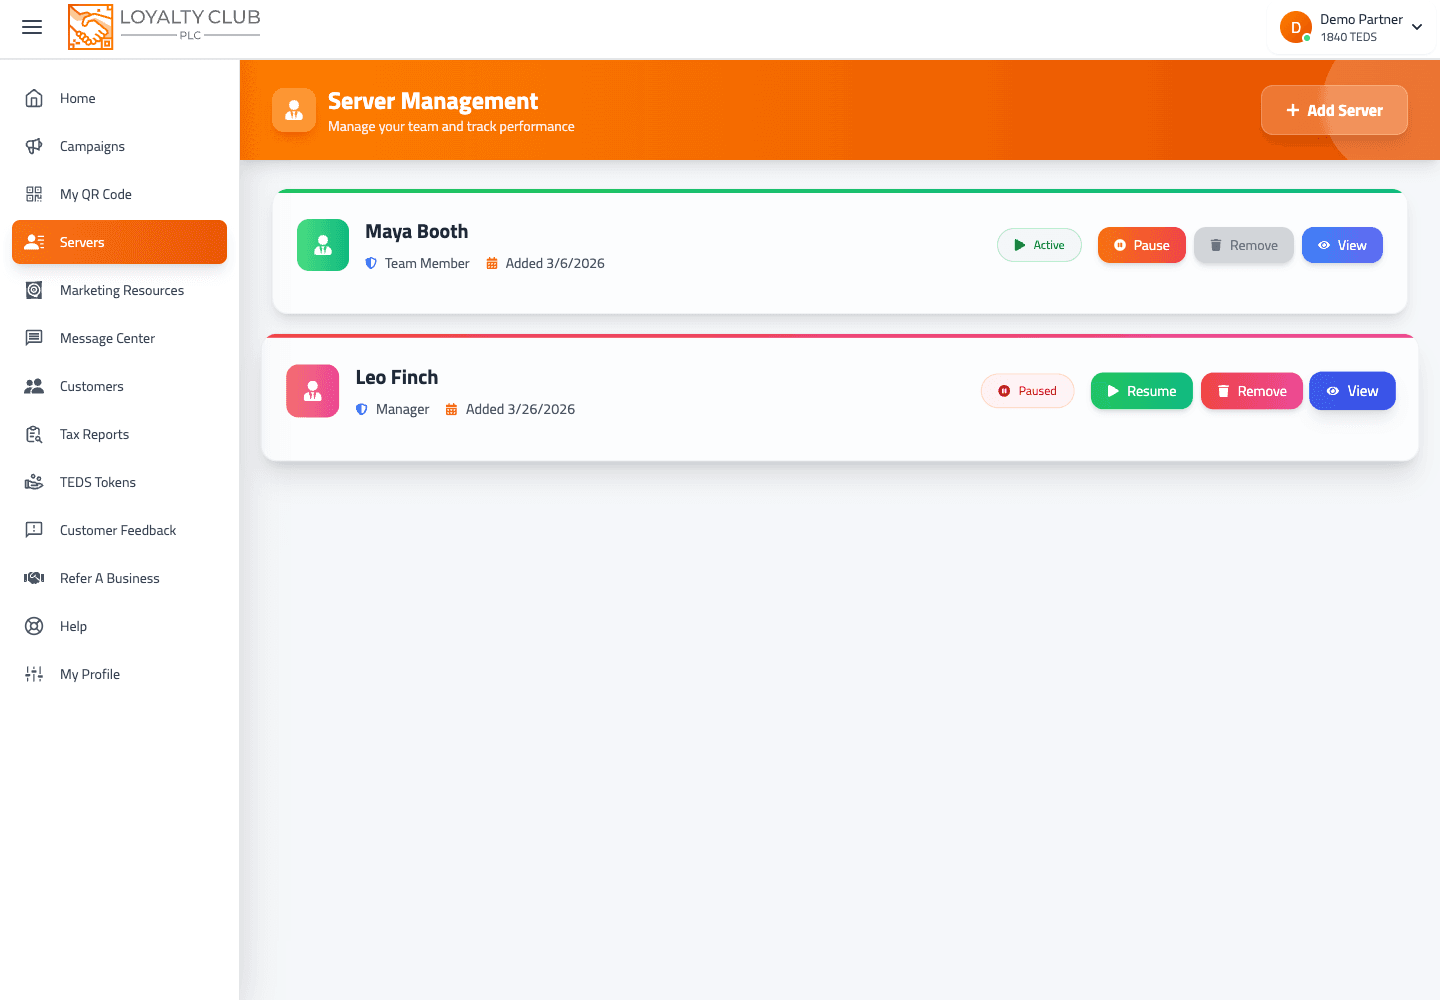
The Servers list page shows your registered staff. Each row has actions:
- View — open the Server detail page.
- Pause — opens a Pause modal.
- Delete — opens a Delete modal.
Both Pause and Delete go through confirmation modals (similar to the campaign Pause / Delete flow).
The View action opens the staff member’s performance page, where you can review their profile, stamps issued, rewards processed, campaign contribution, activity history, and exportable analytics. See Viewing staff performance and server analytics for the full breakdown.
What to know
- Exactly what the staff member receives by email — the invite email and staff onboarding flow can vary. If a staff member doesn’t receive it, open a ticket and we can help.
- Staff seat limits — there’s a
totalServersAllocatedvalue tracked, but the form doesn’t expose limits explicitly. Check the form behaviour when you try to add a staff member. - Resending the invitation — not a labelled action in the current Servers list. If a staff member doesn’t receive their email, open a ticket.
In one sentence
Servers → Add Server → fill name + email + position (+ optional photo) → submit. Pause and Delete from the Servers list for management.