

It is switched on per account while we prove it with live venues. Ask us on the contact form if you would like it enabled.
The slowest part of getting a table menu live is typing in a menu that already exists on paper in your hand. So don't. Photograph it.
In Menu Studio, tap Scan a menu.
Taking the photos
- 01Take a photo, or choose files
On a phone the camera opens straight to the rear lens. On a computer, pick image files. iPhone HEIC photos are accepted.
- 02Add up to six pages
A real menu is rarely one page. Add them all in one go — thumbnails appear with a remove button on each.
- 03Read the pages
Tap Read pages. It takes a few seconds per page.
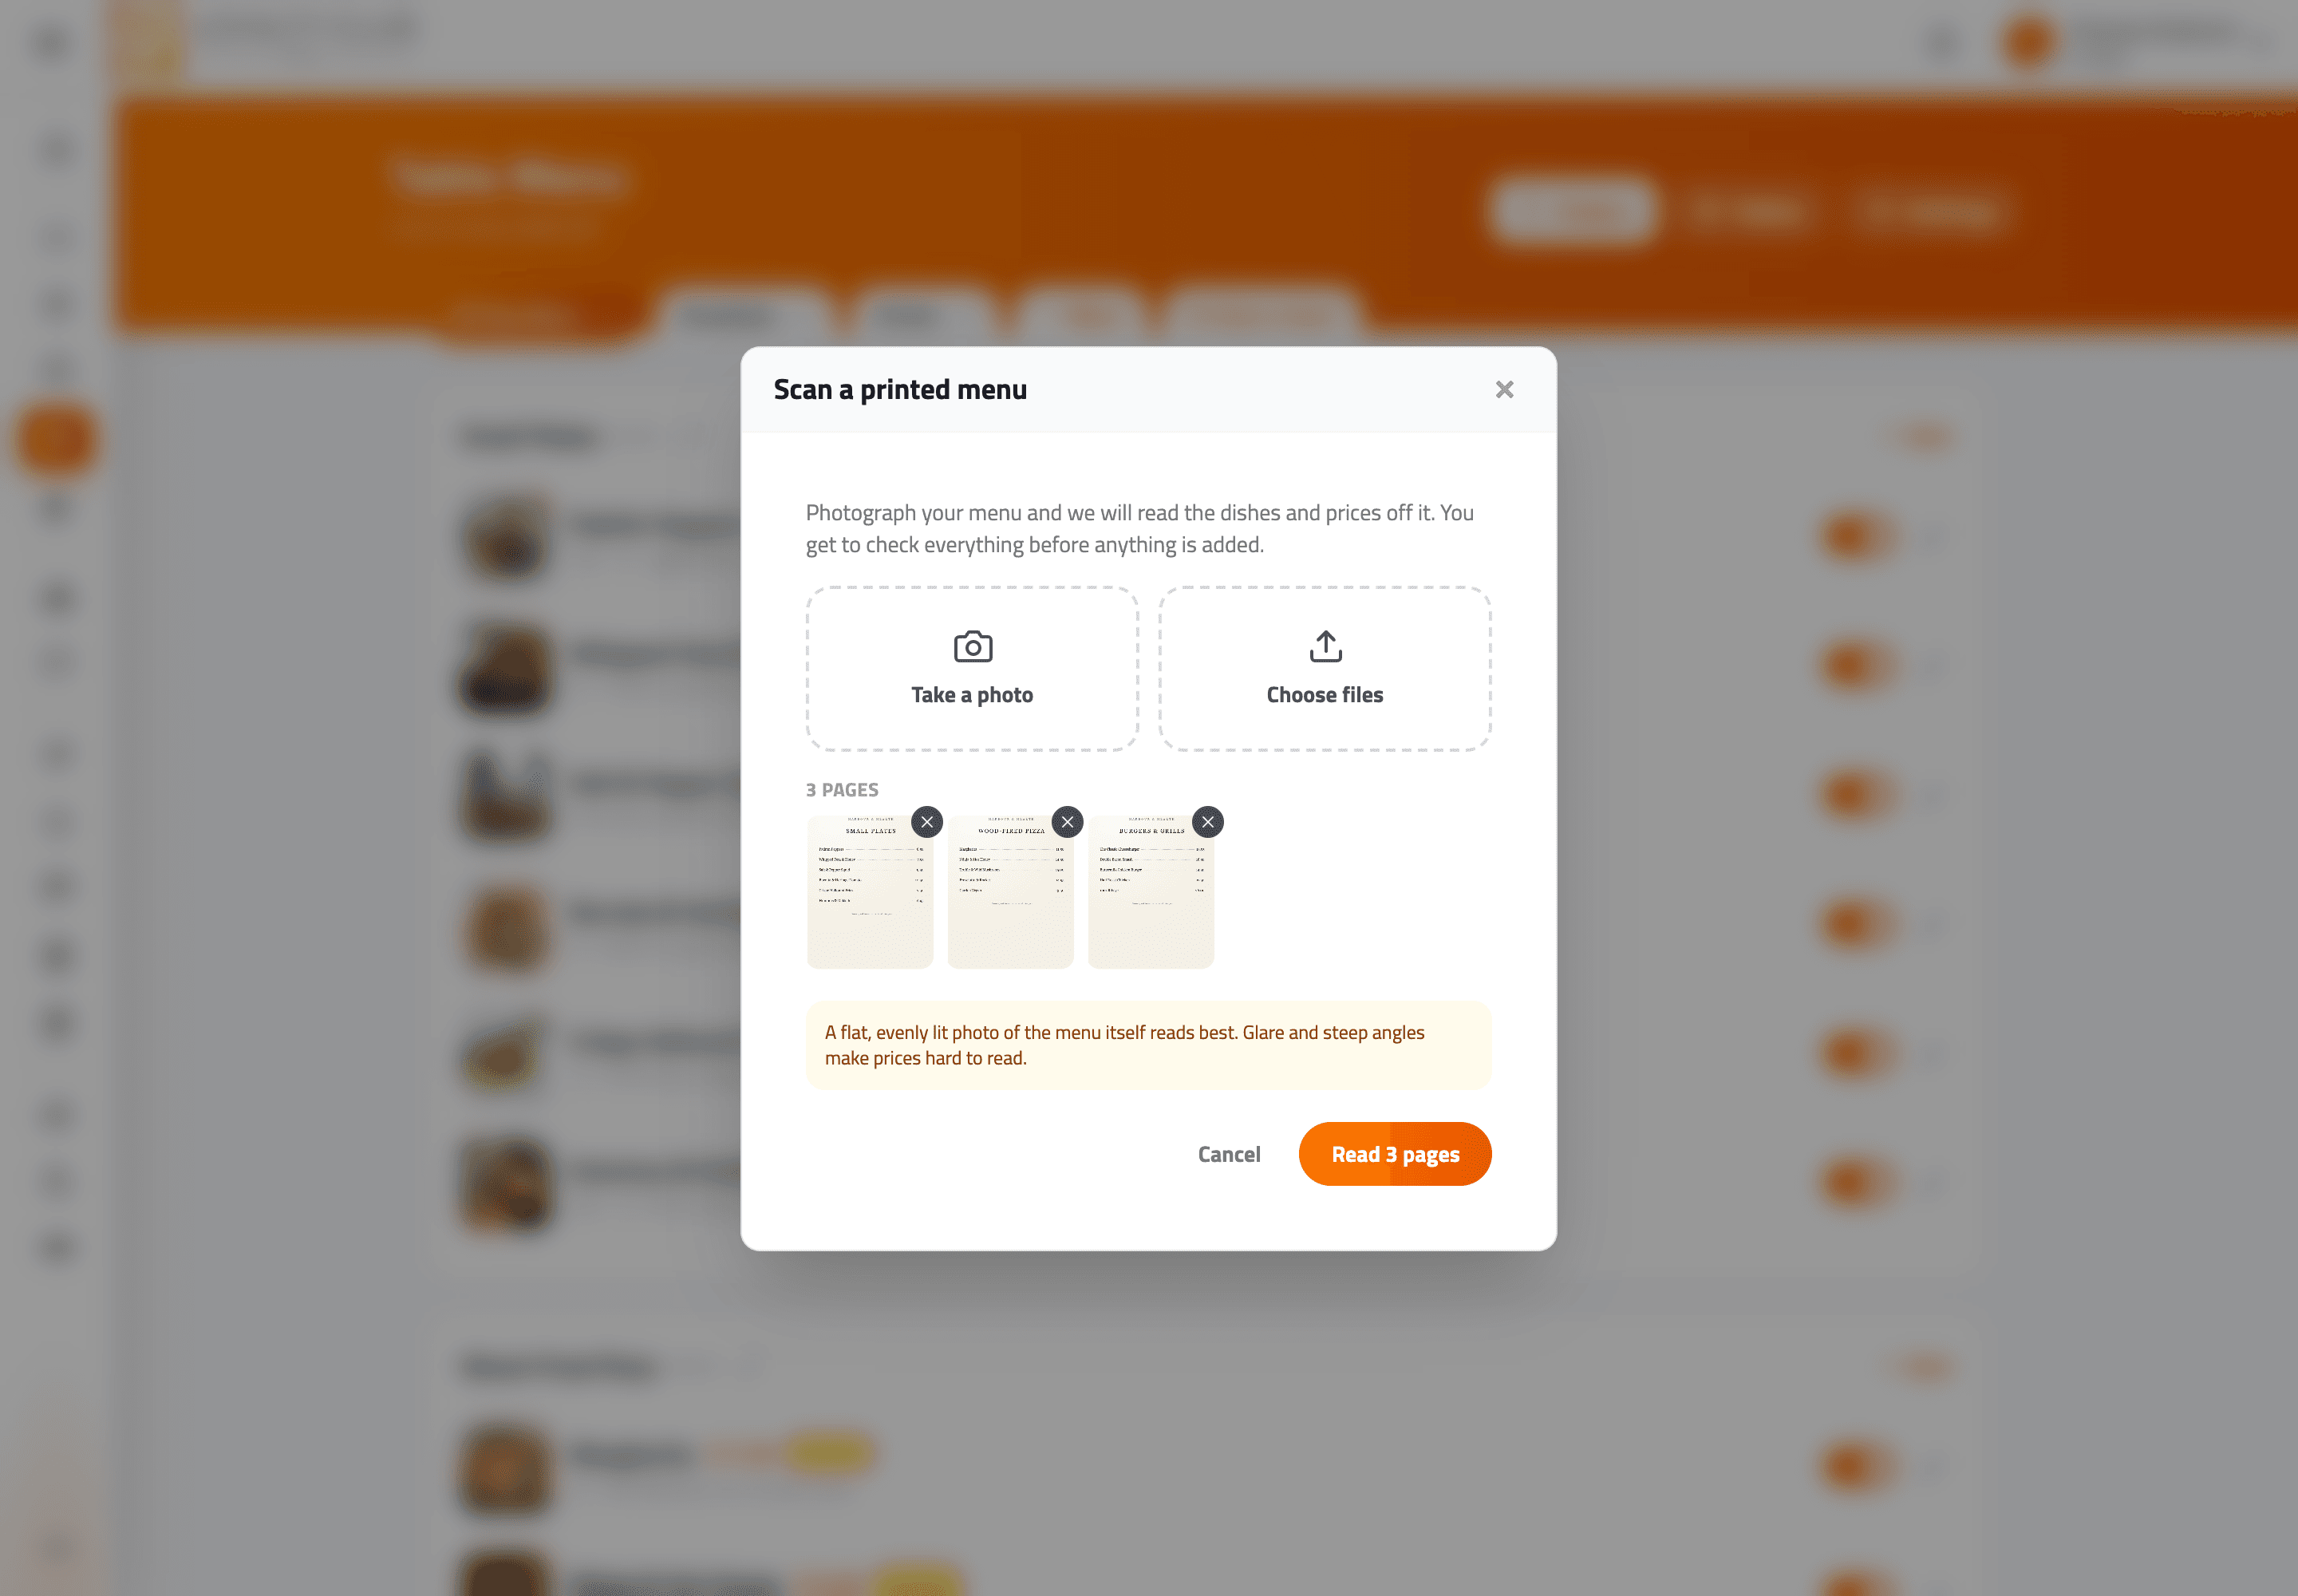
Glare and steep angles make prices hard to read. Lay the menu flat, avoid shooting through a laminate reflection, and take one page per photo rather than a whole spread at a distance.
Checking what was read
This screen is the point of the whole feature, not a formality. A machine read those prices off a photograph, and a wrong one becomes a real charge at a real table.
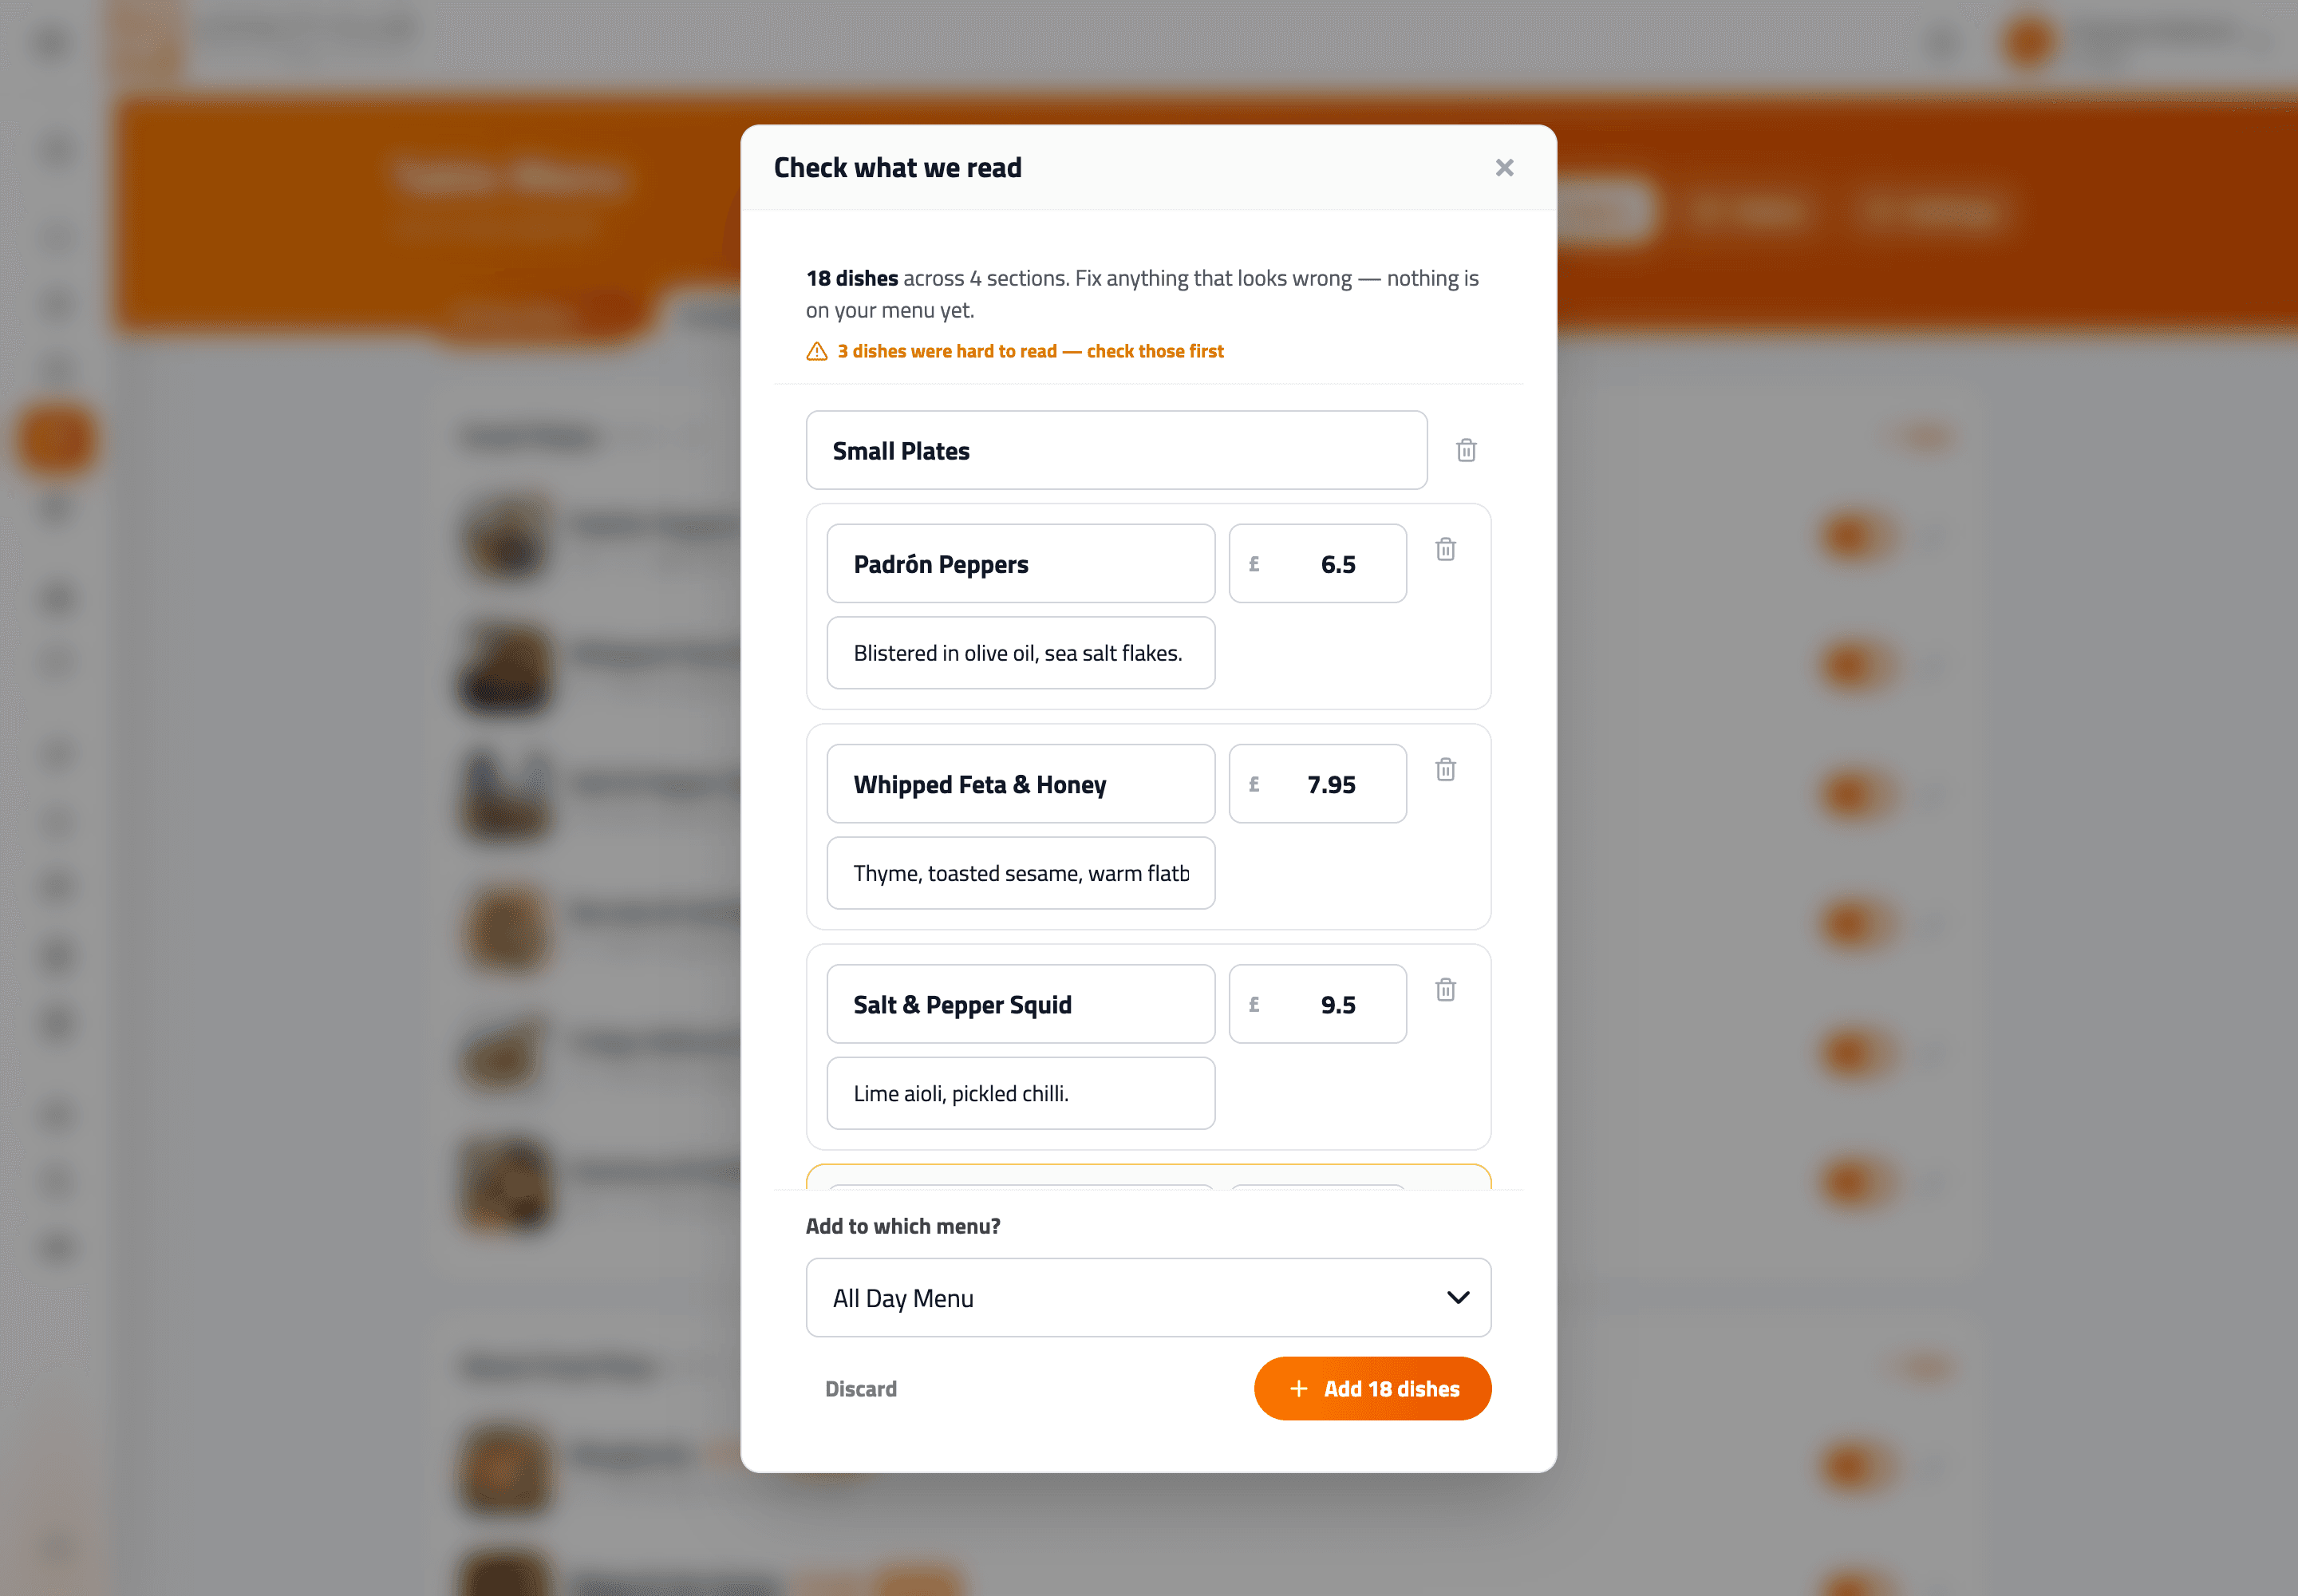
You get a count of dishes and sections, then everything grouped by the sections it detected. From here:
- Edit any field — dish name, description, price, section name.
- Remove any dish you do not want, or a whole section.
- Look at the flagged ones first. Anything hard to read is called out with a count at the top: "3 dishes were hard to read — check those first".
- Choose the target menu the items will be added to.
Nothing has touched your live menu at this point. Closing or discarding leaves your menu exactly as it was.
When it looks right, press the add button — it names the count and the destination, e.g. "Add 34 items to All Day Menu".
What it reads well, and what it doesn't
Being straight about this saves you a frustrating first attempt.
Reliable: dish names, prices, section headings and descriptions, from a flat, evenly lit photo of a printed menu.
Struggles with: laminated menus with glare, chalkboards, heavy script fonts, and multi-column layouts where a price can end up attached to the wrong dish. That last one is exactly why the review screen puts the price next to the name at a readable size.
If a page fails, it fails cleanly with a message — you never end up with half a menu written in.
Allergens are deliberately left blank
Most printed menus do not declare allergens, and a machine guessing that a dish "contains milk" from its name is a legal exposure, not a convenience.
So the scan only records allergens that are explicitly printed on your menu, and leaves the field empty otherwise. Dietary markings (vegan, vegetarian, gluten free) work the same way — extracted only where your menu actually marks them.
After committing a scan, go through the dishes in Menu Studio and tick the 14 UK allergens on each one. This is regulated information and it is yours to get right.
Things worth knowing
- Photos are not attached to dishes. A photo of a menu is not a photo of a dish. Add dish photography separately in Menu Studio.
- Scanning the same menu twice will not double it up.
- You can scan more than once. Do the food menu, then the drinks menu, into different target menus.
- Your source images are kept with the import, so if a price is ever disputed you can see exactly what was read.
In one sentence
Menu Studio → Scan a menu → photograph up to six pages → check and correct everything on the review screen → Add to menu, then fill in the allergens.