

It is switched on per account while we prove it with live venues. Ask us on the contact form if you would like it enabled.
Tables are at /menu/tables. Each one gets its own QR code, which is what makes an order arrive already labelled — you never have to ask a diner where they are sitting.
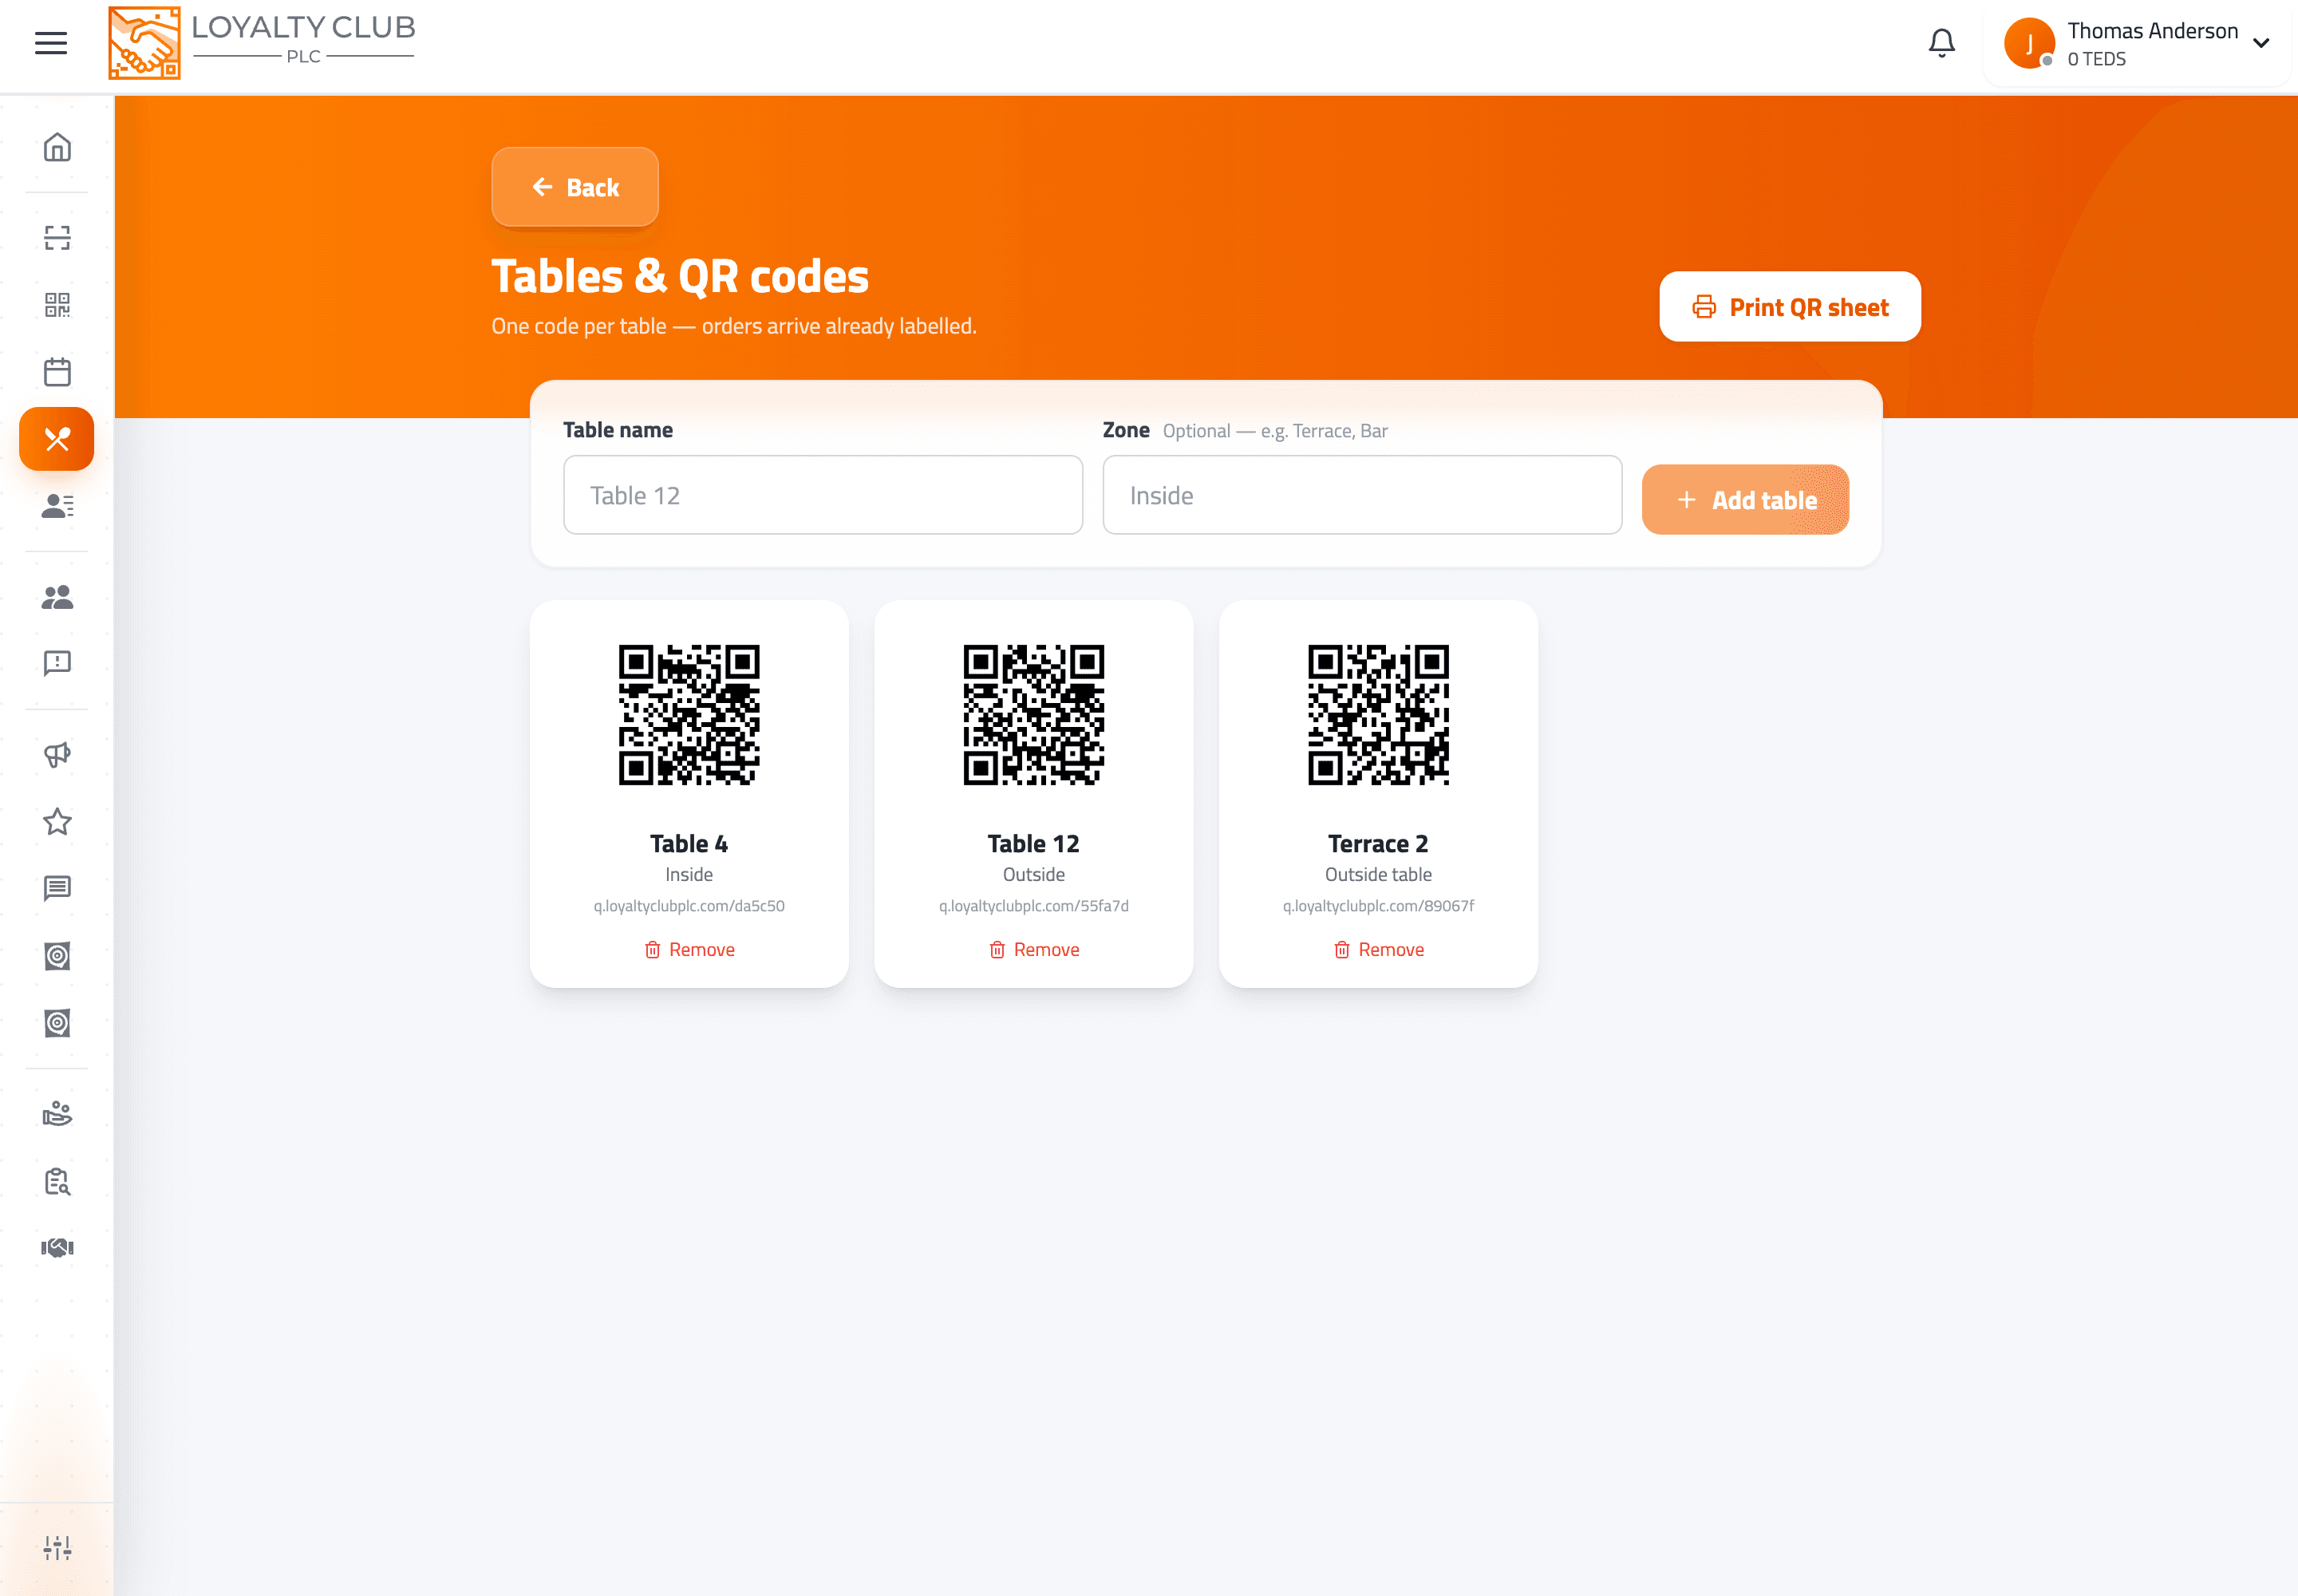
Adding a table
- 01Give it a name
Whatever your team already calls it — "Table 12", "Booth 3", "Window". This is the label that appears at the top of every order card on the board, so use the name staff will recognise instantly.
- 02Add a zone (optional)
"Inside", "Terrace", "Bar", "Garden". Zones group the tables on this screen and on the print sheet.
- 03Add it
The QR code is generated immediately and is ready to print.
Printing the codes
Print QR sheet prints every table's code straight from the browser — there is no file to download or design tool to open. Your venue banner and the table name print alongside each code.
A code around 4–5 cm across scans reliably in normal restaurant lighting. Table talkers, a sticker on the table edge, or the back of a menu card all work — put it where someone can scan without moving anything.
A venue-wide code
You do not have to use per-table codes. A single code works fine for counter service or a market stall — orders simply arrive without a table label. But if you have tables, per-table codes are worth the extra minute: they are the difference between "an order came in" and "Table 12 wants two flat whites".
Removing a table
Removing a table stops its QR code working. Anyone scanning the old printed code sees nothing useful, so reprint whenever you change the layout.
Editing your menu, changing prices, turning ordering off, or pausing the kitchen do not change any table code. Once you have printed them, they keep working — you only need to reprint when you add or remove a table.
In one sentence
/menu/tables → add each table with a name and optional zone → Print QR sheet → put a code on every table, and orders arrive knowing where they came from.