

It is built and running, but switched on account by account while we prove it with live venues — so it will not appear in your portal until we enable it. Ask us on the contact form and we will turn it on.
Table Menu turns the QR code on your table into the whole ordering experience. A diner scans it, your menu opens in their phone's browser, they order and pay — and the visit feeds your loyalty campaign without anyone having to remember to scan a member card.
What the diner sees
No app. No account. No login wall.
- 01They scan the table code
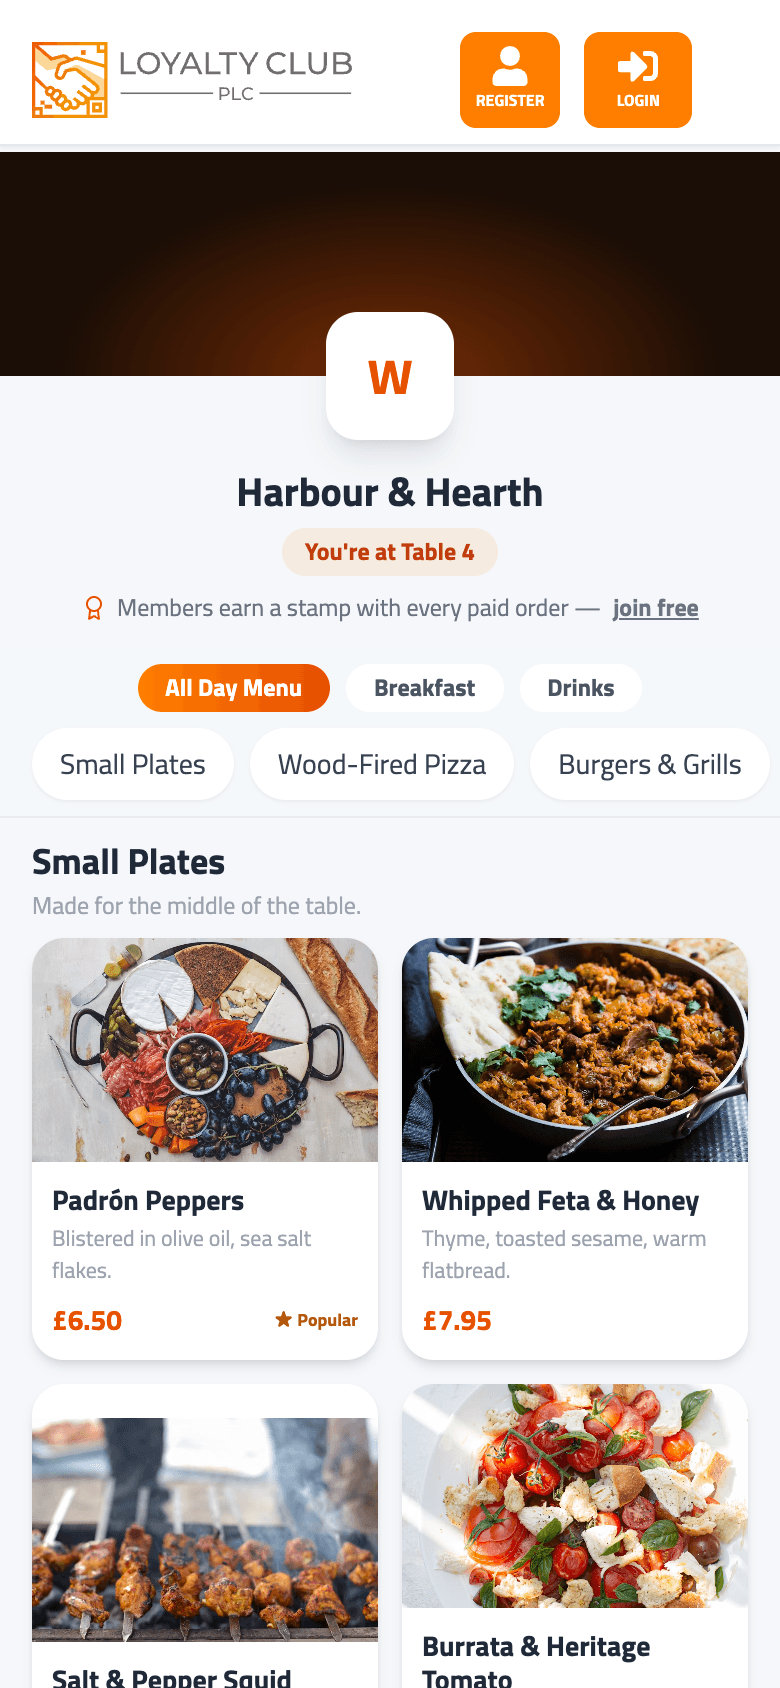
Your menu opens in whatever browser their phone uses. The header shows your banner photo, your venue name and a chip saying which table they are sitting at.
- 02They browse
Photo-led cards for food, compact lists for wines and sides. Each dish can carry photos, a description, dietary tags and its allergens.
- 03They build a basket
Tapping a dish opens a sheet with the full description, allergens, and any option groups you have attached — sizes, toppings, cooking preference. Quantity and a note field ("no onions") sit on the same sheet.
- 04They choose how to pay
Whichever ways you have enabled: at the till, by card there and then, or added to a tab.
- 05They see what it earned
Members see the stamp land. Guests are shown the stamp their order earned and a claim code, with an invitation to join free and collect it.
What you get in the portal
Four screens, all under Table Menu in the side navigation.
| Screen | What it is for |
|---|---|
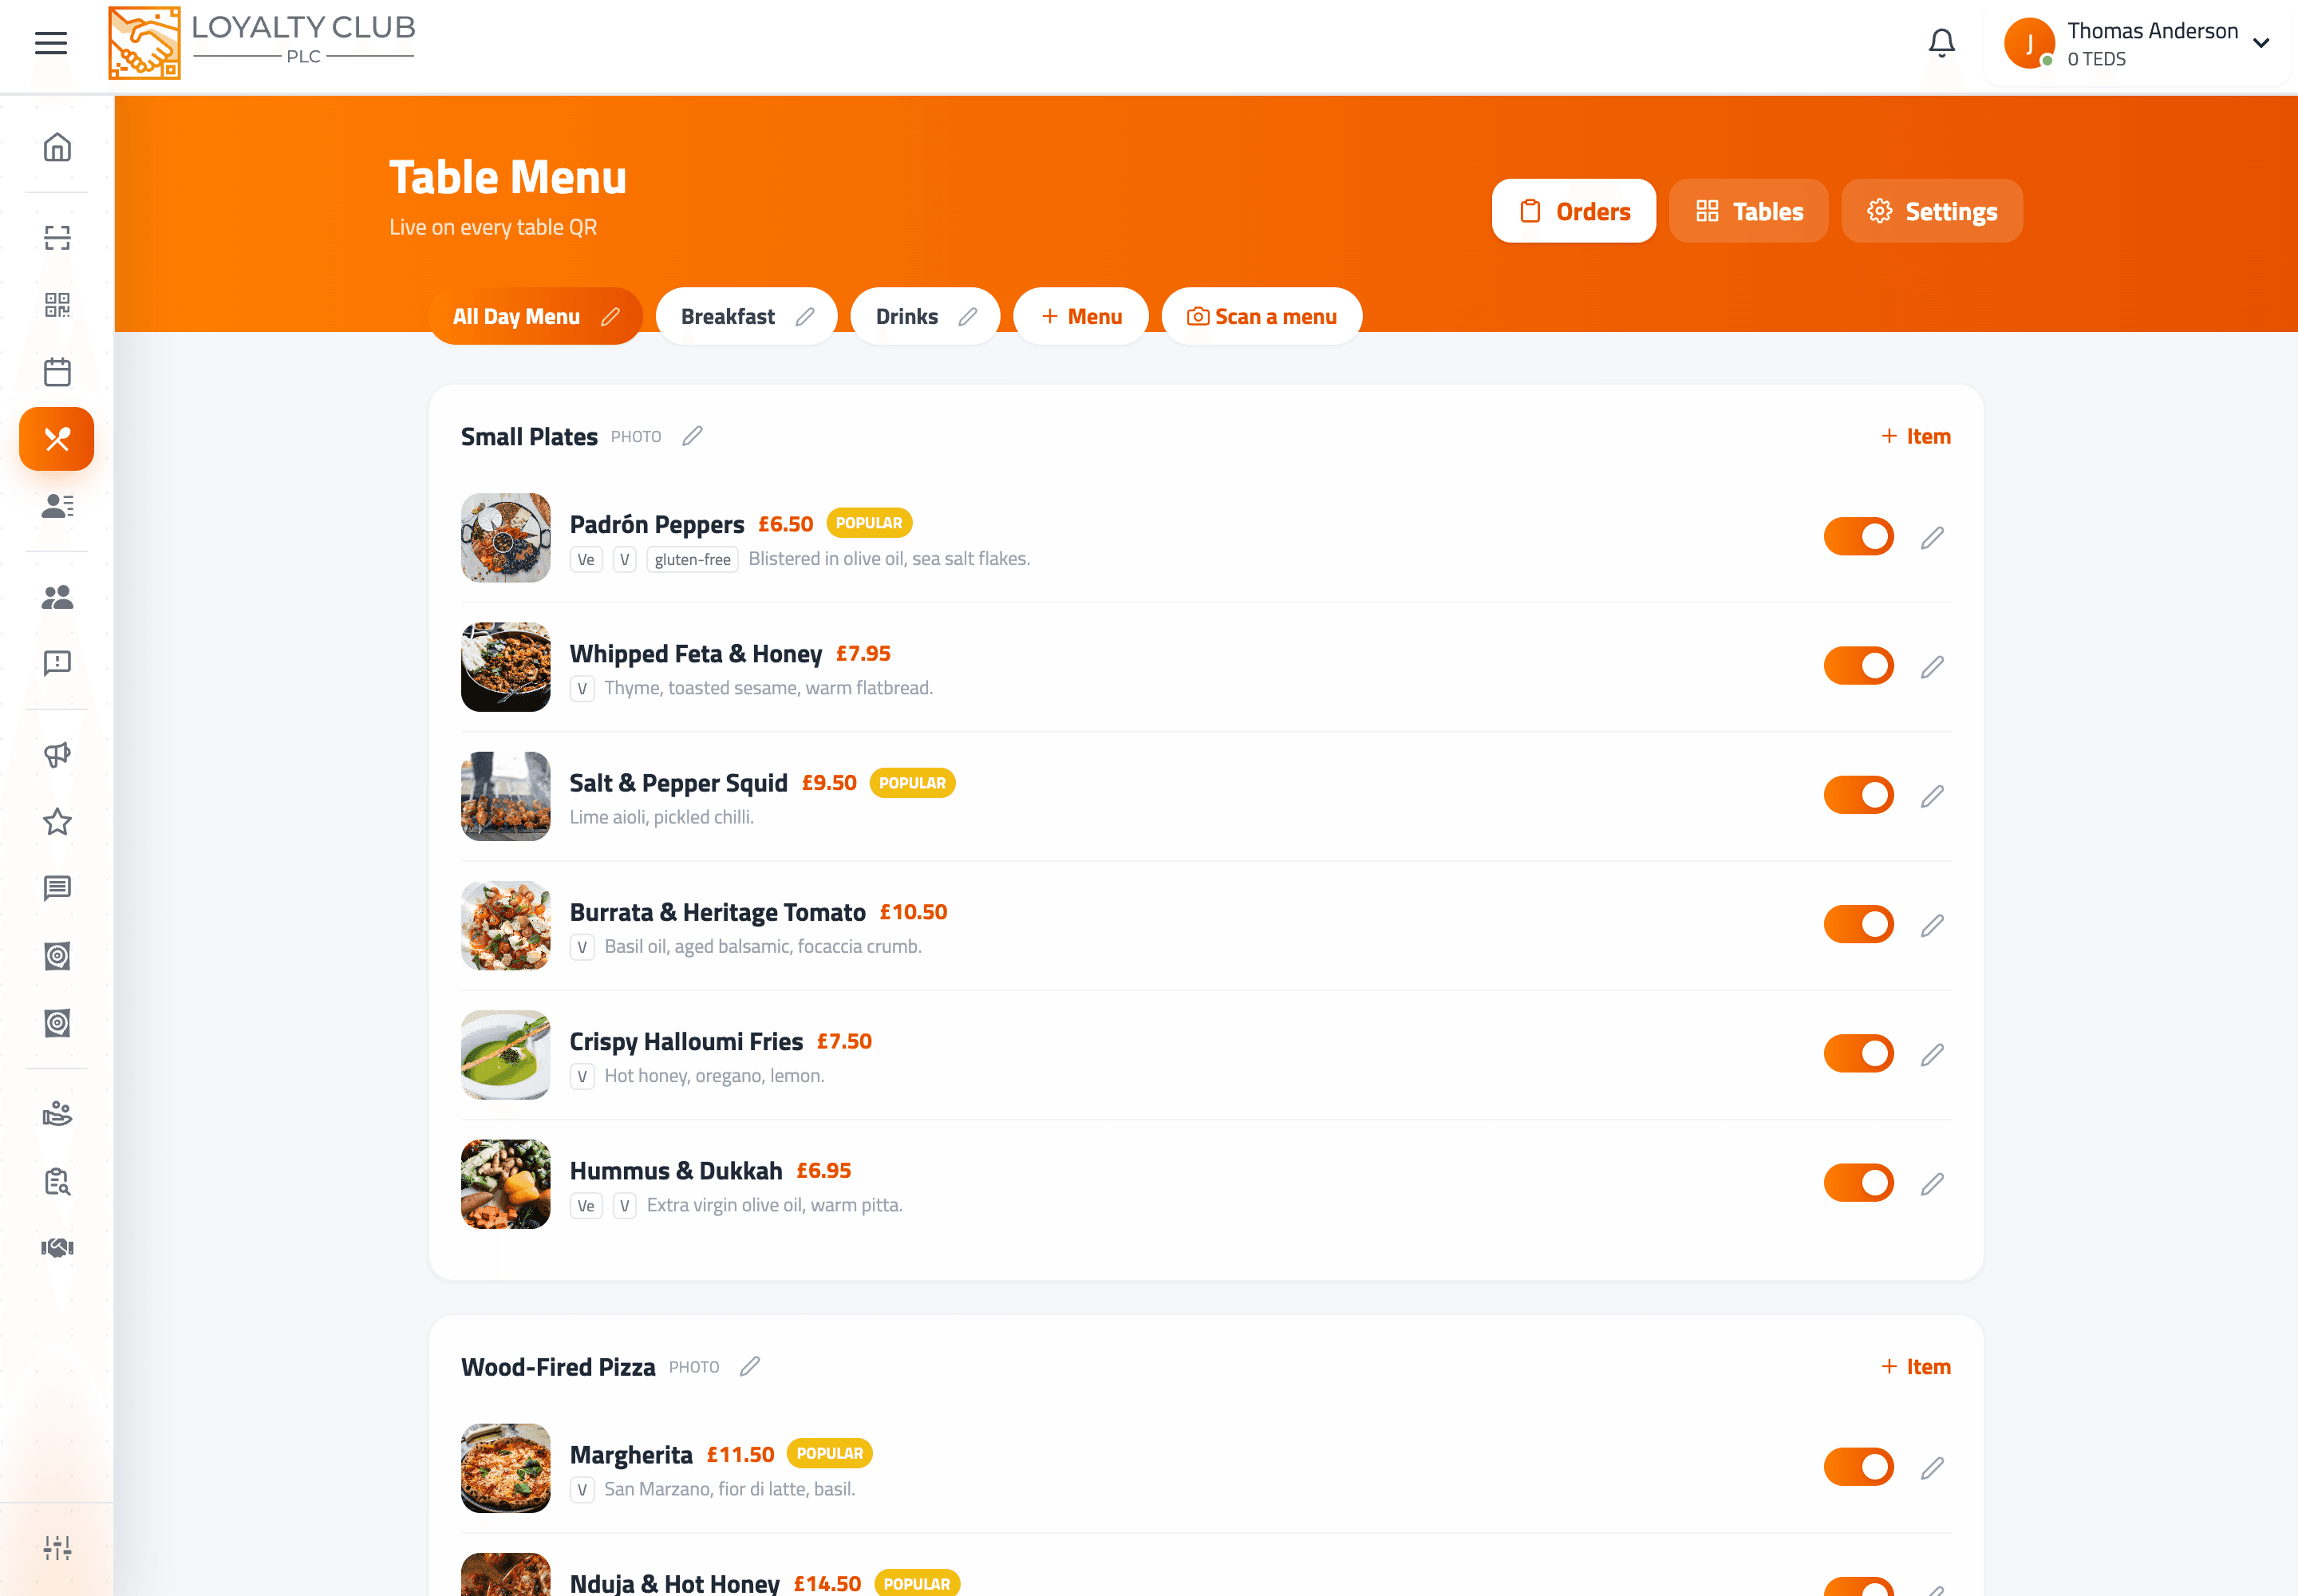
Menu Studio (/menu) | Build menus, sections and dishes. Option groups, photos, allergens, the availability toggle, and the "Scan a menu" flow all live here. |
Table Orders (/menu/orders) | The live order board. Accept, start and complete orders; mark at-till orders paid; settle or write off tabs. |
Tables & QR codes (/menu/tables) | Add each table, get its QR, print the whole room in one sheet. |
Menu settings (/menu/setup) | Whether the menu is live, how orders arrive, ways to pay, tips, service charge, which campaign stamps feed, your banner and your allergen notice. |
How it connects to loyalty
This is the part that matters commercially, and it is covered in full in Stamps from table orders.
- Payment is the trigger. When an order is paid — by card, or when your staff tap Mark paid for an at-till order — a stamp is awarded against the campaign you have linked, exactly as if you had stamped the card in person.
- Spend-based campaigns get the real total. No one types a figure into a scanner.
- Individual dishes can be linked to a campaign. Those dishes show an ember badge on the menu, so diners can see which plate moves them toward a reward.
- Guests generate a claim code. Valid for 14 days. Joining the club redeems it and the stamp lands on their new card.
Setting it up
Two ways to get a menu in place:
- Type it in Menu Studio — see Building your menu.
- Photograph it. If you already have a printed menu, take pictures of it — up to six pages — and the dishes, descriptions and prices are read off the photos for you to check. See Scanning a printed menu.
Then set your table codes up and choose your settings.
Turning ordering off leaves the QR as a browse-only menu — photos, prices, dietary tags and allergens, with no basket. People order at the counter exactly as they do today. It is a good way to start, and switching ordering on later does not change any of the codes you have already printed.
What it does not do yet
Being straight about the edges:
- No live order-status tracking for the diner. They see a confirmation, not a "your food is 4 minutes away" screen.
- No call-waiter button.
- No bill splitting. A tab settles as one bill.
- No POS or till integration. Table Menu runs alongside your till, not inside it.
- No menu translations. Menus are single-language.
In one sentence
Each table gets its own QR that opens your menu in the diner's browser; they order and pay without an account, and paying awards the loyalty stamp automatically.